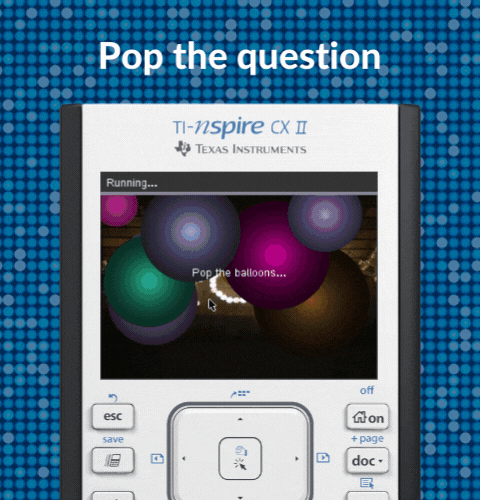
Get Your Promposal Ready — Try Balloons and Buttons
It’s prom season, and it can be hard to keep your students from daydreaming about prom night. How about an activity that will grab their attention while you sneak in some programming skills? Plus, be sure to encourage your students to participate in our TI Promposal Contest. It will provide extra motivation for your students to push their creativity. Encourage your students to enter for a chance to win some cash for their prom night!*
To be honest, it’s been quite some time since I have thought about prom (1966; I did not attend any proms but our wedding song in 1970 was “Can’t Take My Eyes Off You” by Frankie Valli). From what I have seen since, kids these days are doing it up big time, with creative tactics to really get a “yes” from their intended target. Puppies, doughnuts, balloons, sky writing, and more … but yes, even calculators are being used to make a fun — and unique — promposal to get a “yes”, and maybe even a giggle too. I mean, who can say no to a pretty little calculator screen?
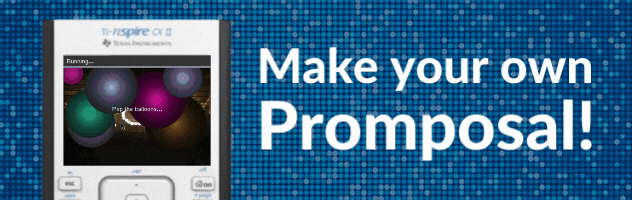
Let’s take a look at two examples that I wrote for the TI-Nspire™ CX II graphing calculator using Python. I’ll even provide the .tns files if you want to download them to study the code and take a crack at editing to make it uniquely yours. There are also two PDF files explaining the programs in more detail which can help you take the code and do something a little different with it.
Example 1: Just Popped By To Ask You to Prom!
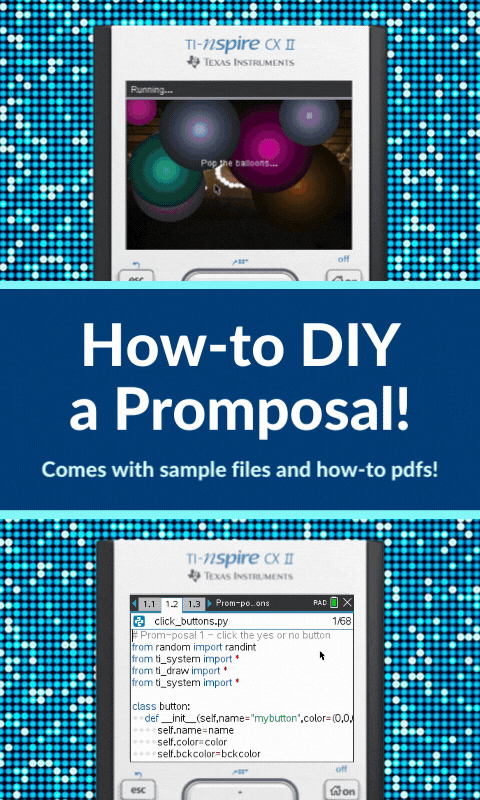
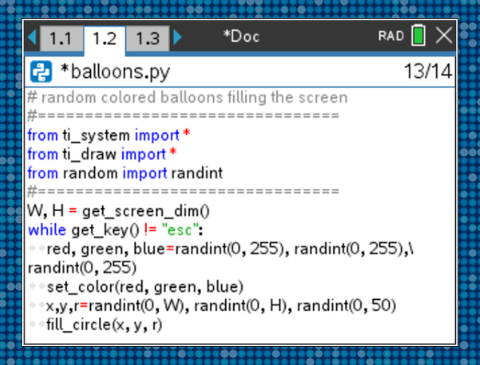
In my promposal research, I came across a picture of a poster covered by balloons to be popped to reveal an invitation written on the poster. That inspired the balloon theme in this project, so I began with the skeleton shown below, balloons.py, which uses my favorite control structure: while get_key() != ”esc”:. The loop body generates a random color (red, green, blue) and draws a filled circle at a random position with a random radius (x, y, r) somewhere on the screen. These circles continue to appear on the screen until the user presses [esc]. Simple, eh? But, then what? More on that shortly.
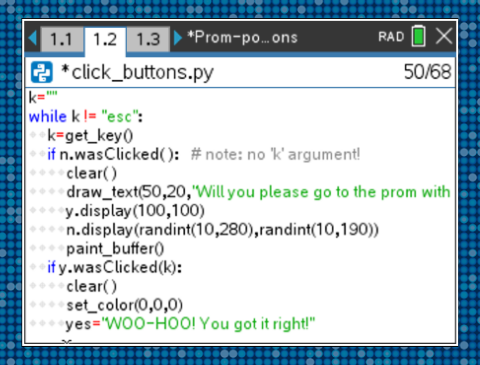
Example 2: Yes! Or No?
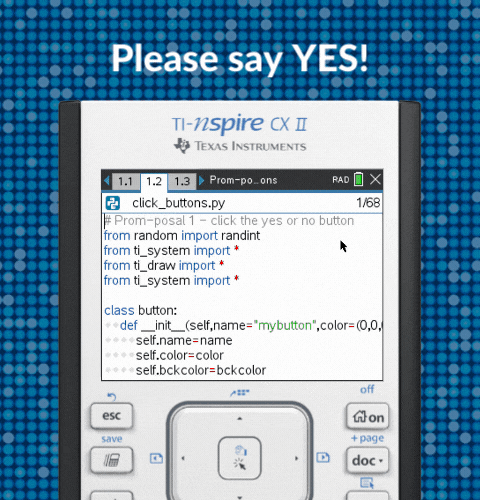
As you can see, this is a fun take on the old circle “YES” or “NO.” But in this Yes/No program, two “buttons” are displayed for the user to select using the cursor. But, surprise, the “No” button is not really clickable! It moves away as soon as the mouse cursor goes over the button. Only the “Yes” button can be clicked. So the requester will always get the answer they had hoped for. A win-win!
What now? How can I (or my students) make my own?
Well, these examples are meant to inspire and motivate you and your students to get creative with those little computers.
These two projects involving balloons and buttons have a lot of common features:
- Both use a graphical display
- Both utilize Python classes (objects)
- Both use get_key() and get_mouse() to determine key presses and mouse cursor positions
- Both make use of a while loop to control the termination of the program
Let’s take a look at four of them in some detail:
1. Graphical display
|
Are you or your students new to Python? For a quick introduction to graphical programming in Python be sure to study the TI Codes materials, especially Unit 5, which briefly introduces some of the unique TI modules: ti_plotlib and ti_draw. Using the drawing functions found in the ti_draw module makes it a breeze to quickly produce custom graphics screens. There is also new material under the Python modules section that deals specifically with the custom ti_* modules. |
2. Python classes
|
A class is structure that “encapsulates” the properties and functions (behaviors) of an “object” just like in many other object-oriented programming (OOP) languages like C++ and Java. First, some sample code: class balloon: def draw(self): This code defines a class. Then, to make a balloon object I write: ball = balloon(randint(0, 255), randint(0, 255),randint(0, 255),\ The six arguments are all random integers (three for the color, two for the position on the screen and one for the radius of the balloon). The button class in the Yes/No project is defined in a similar manner. The __init__ function in any class is the constructor. It is called whenever you create a new object variable. Its job is to assign the values of the arguments to the member variables of the class which all begin with the prefix self. The draw(self) function is responsible for displaying the object on the screen. There could be many balloons and each one has its own properties, so self. refers to each individual object. |
3. get_key() and get_mouse()
|
You should be familiar with get_key() from the popular statement while get_key() != “esc” in the ti_system menu. Using get_key() in a loop, you can check to see which key was pressed and perform some actions accordingly. Usage: k = get_key() or k=get_key(1). If the argument 1 is used, then the program pauses and waits for a key press. If no argument is used, then the program performs all the other actions in the loop, thus making animation possible. get_mouse() is also found in the ti_system menu and is another input tool. It takes no arguments and returns the current mouse position on the screen (the tip of the arrow pointer). It returns two values: the x and y coordinates of the point on the screen using the default viewing window [where (0,0) is the upper-left corner of the screen]. Usage: x, y = get_mouse( ). These values can then be compared to objects’ (like balloons or buttons) positions on the screen. Here is some sample code from the balloon project showing the use of both functions:
k=get_key(1) top is the topmost balloon on the screen. is_clicked(x, y) is a class function (not shown) that determines if the top balloon was actually clicked. blist.pop( ) is the Python function that removes the last element from the blist. |
4. while loops and key presses
|
k is initialized to be an empty string to get the loop started. The loop continues until the “esc” key is pressed. Maybe. k is assigned a new value when a key is pressed. If it is the “center” key, then one of the two buttons is processed. (There’s one more detail in the program not shown here.) |
You can have a look at the complete programs in the links on each example to explain more of the coding (both the .tns file and detailed PDF document are available).

Example 1: Popped By To Ask You to Prom
Example 2: Yes! Or No?
Whatever your “prom style” may be, I hope that your students will be Nspired to take a look at these samples, make them their own or, even better, create their very own promposal and enter the contest! See you on the dance floor kids (do you still do “the twist”?).
About the author: John Is a retired teacher splitting time between sailing in New Jersey and mountain biking in Florida (did he get that backwards?), still getting kicks out of working with TI to provide feedback on new products and developing meaningful programming content for mathematics and science … and still having fun with all the graphing calculators and the accompanying toys.
*Terms and conditions apply. See drawing rules on the contest site for details.